Home » Blog » Easy Steps to Installing Do-It-Yourself Custom Cut Glass Shelves
Posted on : 07-07-2020 Author : Preeti Gandhi
Glass shelves are ideal for converting small corners or sides of your home into serene yet useful sites where big decoration pieces cannot be installed. However, custom cut glass shelves can fit into any area of your home to render an elegant look while allowing you to store some useful or cool things on it.
These most versatile options match nearly every kind of décor and feature a weight, shape, and size that are apt for your chosen wall. Several fruitful applications of these shelves exist; apart from kitchens, you can place them in dining rooms, closets, living rooms, bathrooms, and balconies.
In living rooms, these shelves blend into the environment to trigger a transparent view. Similarly, in kitchens, they are strong enough to endure the weight of storage cans while creating a fresh and airy feel. In balconies, they also give you a clear view of your front-facing garden or lawn.
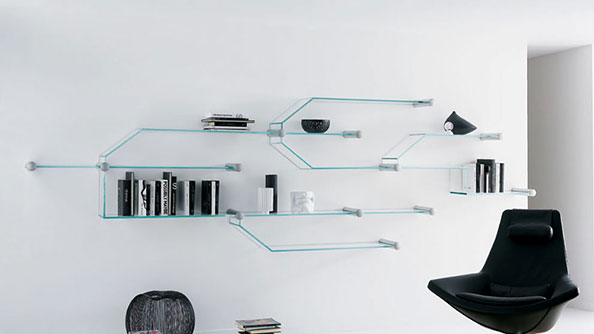
There are many types of glass shelves, such as floating, kitchen, wall-mounted, and bathroom glass shelves. However, you can easily find a custom-cut one in each of the available categories. You can even get them designed by sharing your requirements such as shape and size.
The most important task for installing any glass shelf is to choose the right shelf style and glass type at the time of buying. Avoid choosing a thin glass if you will be placing on heavy items on it. For such items, you need a thick and well-tempered glass.
If your goal is to have a childproof corner, a floating glass shelf is ideal. In case of a narrow wall space, a horizontally long glass with a bent slope is ideal.
Once you get the desired custom cut glass shelf, it is now time to install it. You can consult a professional for the same. However, the DIY part is pretty interesting to try.
As the first step, you need to decide how to place the shelf for ensuring an elegant effect. If there are more than two shelves, consider arranging them vertically and leave enough space for the objects to reside well. You may decide to place even brackets as per the shelf style.
Once you identify where and how to place the shelf, implement the following steps:
So, are you ready to enjoy this DIY task?